Instructions for using the OS for mining Hive OS: installation, launch, configuration, application and updating, errors and the most common questions of novice miners. This article will focus on the most popular operating system for mining – Hive OS. The basis is Linux, and Hive OS itself is designed to work with video cards and AISC miners – special equipment for mining cryptocurrencies. With the help of Hive OS, it is convenient to set up mining programs, manage wallets, overclock PC components, maintain the system and much more. The most interesting thing is that all this happens through the browser. All controls are presented on the official website.

- HiveOS Overview
- Paid tariffs
- Technical requirements
- Advantages and disadvantages
- Registration in Hive OS
- Downloading the image and installing the Hive OS operating system
- Adding workers
- Mining start
- Hive OS Driver Update
- Overclocking video cards
- Mining farm management
- Hive OS update
- HiveOS Firmware
- Frequently Asked Questions, Errors and Solutions
HiveOS Overview
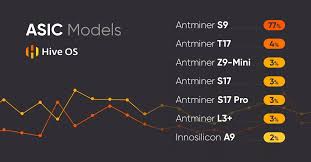
The Hive OS operating system (official site https://hiveon.net/) is compatible with video cards from popular companies, such as AMD and NVidia. However, it is most in demand in conjunction with ASIC miners. They appeared to reduce electricity consumption, since modern video cards and processors are designed for other purposes.
The platform fully supports the Russian language – even highly specialized terms are translated. However, miners recommend using Hive OS exclusively in English.
You can work on Hive OS for free if you use only one worker. However, if you are mining Ethereum (ETH), you can use up to four workers. But you will have to mine only in the pool of the platform – Hiveon. For full-fledged work, the cost of maintaining one mining farm will cost $ 3 per month. There is another option – to mine in the Hiveon pool. In this case, you can give 3 percent of the funds received.
Paid tariffs
Using the paid version of Hive OS is more profitable for the following reasons:
- access to all platform functions;
- the ability to connect an unlimited number of workers;
- you can track statistics for the last 30 days;
- secure SSL connection for each worker;
- simultaneous management of multiple farms;
- technical support and access to a closed community.

Technical requirements
Any OS has minimum system requirements, Hive OS is no exception, for full-fledged work you need:
- 8th generation Intel Core or 6th generation AMD processor;
- 4 GB of RAM;
- 4 GB of memory for installing the system – you can use any type of drive, even a regular USB flash drive;
- video card.
It is worth noting that mining some digital coins may require more RAM. For example, for ether (ETH), 6 GB would be the minimum.
Advantages and disadvantages
Hive OS is used because of its availability and detailed instructions for use. This allows the platform to remain a leader among competitors. Consider the main pros and cons. Advantages:
- easy to install and configure even for an inexperienced user;
- everything is translated into Russian;
- the system is not demanding on the drive – even 8 GB of memory is enough;
- efficient distribution of resources and energy efficiency with the right equipment settings;
- you can mine several coins at the same time;
- remote management of a mining farm.
Flaws:
- possible short-term failures in the system;
- The OS is rarely updated;
- the platform transfers information about users to third parties, which means it can be used by attackers;
- there are few rigs for the free period, the paid one comes after the fourth.
For a publicly available operating system, the disadvantages are insignificant. This is evidenced by the popularity of Hive OS in the field of mining, as well as the overall approach to work.

Registration in Hive OS
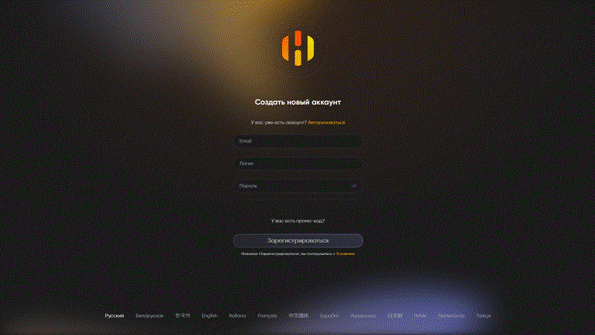
To install the OS, you need to download the image somewhere. You can do this on the official website – hiveon.com/en. However, you will need to go through the registration process in order to work. Please note that the site may not be available in some countries. In this case, you need to change the IP address, for example, with a VPN service, a proxy, or a mirror site.

Downloading the image and installing the Hive OS operating system
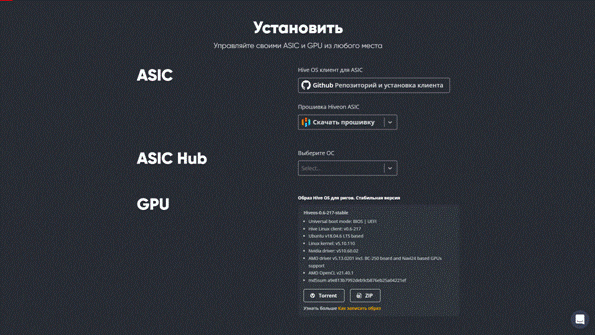
It is necessary to download Hive OS only from the official website, since custom versions may contain potentially dangerous add-ons.
To download, you will need to return to the main page of the project, and then go to the “Install” tab;
Adding workers
By this stage, the main process of setting up an account should already be completed, you can proceed to the workers. You can connect them in two ways:
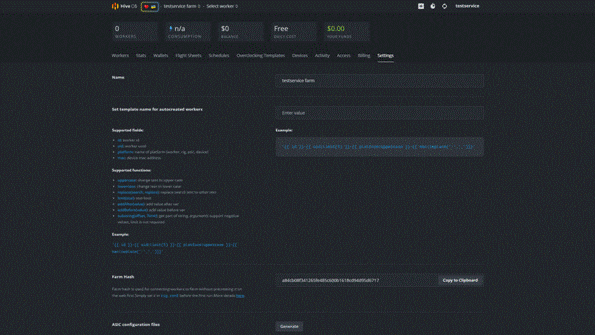
- through the key “FARM_HASH”;
- using manual setting.
The first option is more preferable, since it does not require additional manipulations from the user. Step by step instructions for adding a worker:
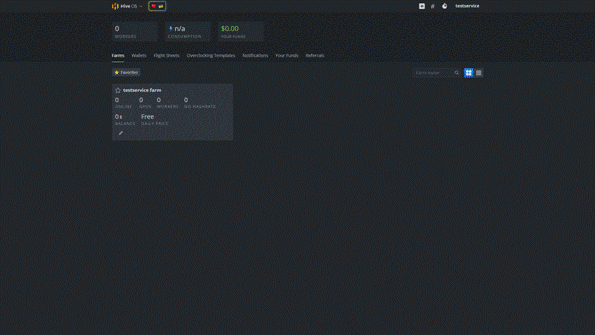
- go to the farm – one is created automatically during registration;
- in the upper right part of the screen, click “Add Worker”;
- select the type of farm – ASIC or standard GPU;
- assign a name to the “Name” field, it can be any value;
- set a password for the miner in the “Password” field;
- click on the “Add” button.
Mining start
To start mining on Hive OS, you need to create a wallet that will store the mined cryptocurrency. The vault for the mined coin must already be created. You can use either a crypto exchange, for example, Binance, or one of the existing crypto wallets.
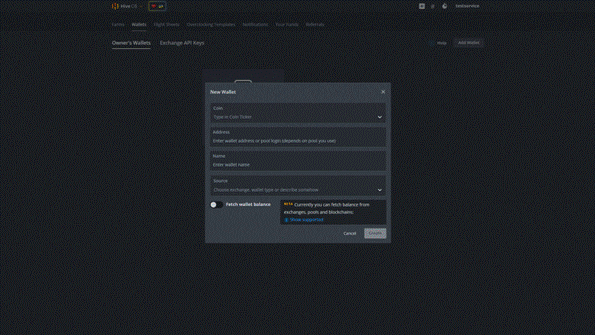
- coin – the coin that the farm will mine;
- address — wallet on a decentralized service or crypto exchange;
- name – a free field in which you can write an arbitrary name, for example, “My Ether”;
- source – here you need to select a source from the drop-down list.
When the wallet is created, you need to go to the next tab – “Flight Sheets”. They will be needed during the cryptocurrency mining process.

Hive OS Driver Update
The Hive OS operating system allows you to update drivers on video cards from popular companies. However, this can only be done automatically on NVidia, but you need to install drivers on AMD along with the Hive OS image of version 0.5 or more, which has the ability to update drivers via the web interface and SSH connection. This became possible after iteration of the script, allowing you to install the most efficient drivers for video cards. The process is especially relevant when using the most advanced equipment, as companies are constantly improving software. It is enough to enter the following command into the console: nvidia-driver-update. It will start updating the drivers to the latest existing version. However, keep in mind that the download is made not from the official website of the manufacturer, but from the Hive server. That is, developers must optimize the driver for their operating system. You can check for available drivers with the command: nvidia-driver-update –list. The above commands only work in the SSH console, so you must first connect to the mining farm. You can do this using one of the programs by entering the host address and password.
Overclocking video cards
For overclocking video cards in Hive OS, there is a separate section in the web interface. It is called “Overclocking Templates” – this is a tab in your account.


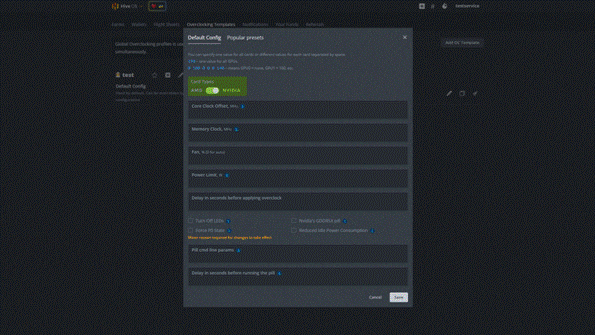
- Core Clock Offset – this is a smart field that implies overclocking by the entered value, however, if it is less than 500 MHz, a slowdown will occur;
- Memory Clock – a value that affects the overclocking of the video card’s memory;
- Fan – percentage value, affects the operation of video card coolers – if set to 0, the adjustment will be automatic depending on the temperature;
- Power Limit – the maximum allowable power consumption in watts;
- Delay in seconds before applying overclock — delay before starting overclocking of the video card.
These are the main parameters, but there are others that do not have a particular impact on performance. For example, turning off LED indicators or additional fixes for some cards. It is best to use popular presets that have the most suitable settings. Just select one of them and save the profile. It is worth considering the level of overclocking, the approximate temperature, and also provide for cooling – will the current one cope. If the cooling is only built-in, then it is better not to overclock to full, since some vendors install less efficient cooling elements.

Mining farm management
The entire process of managing a rig or a mining farm after it is set up is carried out in your personal account. You need to select an active farm inside the platform, and then a worker that mines cryptocurrency. The main controls can be seen at the top. Operations that can be performed:
- enable / disable the mining farm;
- manage power supply, temperature of components, cooling;
- configure work through VPN and some other network parameters;
- work with console commands supported by Linux OS;
- execute commands inside Hive OS and the farm itself.
These are the most basic operations, in fact there are many more. Setting up, installing and mining on HiveOS: a complete step-by-step instruction – https://youtu.be/TKEBtouD1U0
Hive OS update
Hive OS can update automatically, but sometimes this process can fail. Therefore, the developers have added a universal solution to this problem – updating via SSH. You can connect through third-party programs, or you can use the built-in remote access of the rig – Hive Shell. This is a clickable link in the farm management settings that opens the remote server access window. Keeping your operating system up to date is extremely important because new versions contain both support for new graphics cards and new drivers. In addition, new versions have fewer flaws and bugs. To install the new version, enter the following command into the console: hive-replace -y –stabe. The update process will begin, the time of which depends on the Internet connection. When the new version is downloaded, you need to restart the rig and you can continue working. However, it is worth checking the update for new, more efficient miners. If there are any, you should go to the “Flight Sheets” tab and select another miner.
HiveOS Firmware
Especially for owners of ASIC miners, Hive OS releases firmware that allows you to increase the efficiency of the entire farm, as well as reduce power consumption. They are subdivided into specific ASIC models and presented as a fix to the main OS with installation instructions. You can find them at the link: https://hiveon.com/ru/asic/

Frequently Asked Questions, Errors and Solutions
Can I use a simple flash drive and mine on a personal computer? Yes, with Hive OS it is possible, since the operating system itself weighs less than the usual Windows. Usually this method is used when they want to test Hive OS, but for permanent use this is not the best option. The fact is that the read speed of the USB drive is too low to ensure the correct mining process. They also break very often with continuous use. It is recommended to use a minimum capacity SSD or an existing HDD.
No connection to rigA common problem that is not always a problem. Hive OS has so-called agents that send up-to-date information to the server once in a certain period of time. For example, at startup, it may not have time to update the information, and the user will assume that the farm is not working. Another option is the file system. Access may be incorrectly configured. The agent will not be able to save temporary files and send them to the server. However, when installing the OS, all settings are set correctly, if they have not changed, then this option can not even be considered. There may also be problems with the Internet connection, for example, temporary problems with the provider. To test the connection, you can use the command for remote access: net-test. If the server responds, then everything is in order.
Error Error install hive-miner This error occurs due to the inability to install the miner for some reason. This is usually due to an incompatible version of the operating system and errors during installation. Roughly speaking, this is a flaw of the Hive OS developers. Most often, it appears when new updates are released, so the only right solution is to install an image of an earlier version. This will require remote access and the following command: selfupgrade [version].
GPU driver error no tempsThis error indicates a problem with the driver. Usually, information about the video card is not displayed: temperature, workload, cooler speed, and so on. However, this is not always the case. Of course, you can try reinstalling the driver, especially if there are new updates. But if the image is installed for the first time, then it is likely that it was damaged due to a poor-quality drive or an incorrect burning process. It is worth trying to reinstall the operating system. Mining using the Hive OS operating system is not only convenient, but also quite effective. Pre-designed processes, remote control elements, efficiency improvements and device support make this method of mining attractive not only for beginners, but also for professionals in this field. In fact, With the help of this service, you can build a huge mining farm without thinking about management and organization. All you need is to set up the machines once, and then manage them through your personal account.
