
Git is a command-line utility for version control, that is, for keeping a history of changes that the user makes to project files. It is usually used to work on applications, but it can be used in other cases, for example, designers use Git to store different versions of drawings and layouts. Git allows you to rollback an application to an earlier version, compare and analyze changes.

- Git for beginners: basic terms and concepts, introductory guide
- How Git Works
- Installing Git
- Presetting Git
- Creating Your First Git Repository
- When to Commit
- Collaborate on Git projects
- A common problem when working with a Git project
- Useful commands – Git commands
- GUI programs for working with Git
- GitHub Desktop
- Sourcetree
- GitKraken
- Trading Bots on GitHub – Bot Github Open Source
- Python Trading Robot
- Trading bot Cassandre
- EA31337 Libre
Git for beginners: basic terms and concepts, introductory guide
Before you start working with Git, you need to understand what a repository, commit, and branch are.
A repository is a place where code or other data is stored, as well as a history of their changes. The Git program runs locally and all information is stored on your computer, but you can also use Internet services. The most popular of them is Github. There are two more well-known ones: Bitbucket and GitLab.

A commit is a snapshot of the state of a project at a specific point in time. It has a unique ID and comments.
A branch is a history of changes made to a project. It has its own name and consists of commits. A repository can have multiple branches that branch off or merge with other branches.
How Git Works
Let’s show visually how the Git storage system is arranged, using a simple drawing as an example.


Installing Git
Git is a console utility that can run on Windows, Mac OS, and Linux operating systems. We will tell you how to install it for each of them. To install under Windows OS, you need to download the application from the official website https://git-scm.com/downloads and install it.

brew install git If Homebrew is not installed, then run:
git –version After that, in the window that appears, you will be prompted to install the Command Line Tools. Git will also be installed with this utility. For Linux Debian and other distributions based on this version, such as Ubuntu or Mint, the following command is required to install:
sudo apt install gitFor Linux CentOS, you need to enter:
sudo yum install git What is Git, installation and configuration – installation: https://youtu.be/bkNCylkzFRk
Presetting Git
After installing Git, you need to configure it so that each time you create a commit, the name of the author is indicated. To do this, run git and execute the command:
git config –global user.name ”
Author
“ Here, instead of “Author”, we set our name, for example, “Ivan_Petrov”. After that, you can set the email address with the following command:
git config –global user.email “You_adr@email.com” In this case, instead of “You_adr@email.com” we indicate the real email address. 
Creating Your First Git Repository
To create a repository, first go to the project folder. For example, on Windows this might be D:/GitProject. Enter the command:
cd
d:\GitProject After that, create the repository:
git init After that, add all the files:
git add –all To add a specific file, enter:
git add filename Now you can create a commit:
git commit -m “comment” Some notes on creating a repository:
- A repository can have many files and subfolders (mostly just a regular folder).
- It’s best to have a separate repository for each project.
- Don’t create folders for a repository inside another repository (avoid matryoshka repositories!).
- Changes made to repository folders are “tracked” by Git, but these changes must be added to the repository in order to be tracked or recorded.
- You can control the elements that Git “watches”. It is best to ignore very large datasets or temporary files.

When to Commit
Commits in Git are recommended in the following cases:
- new functionality added to the project;
- all bugs fixed;
- you are closing for today and want to save your changes.

Collaborate on Git projects
Let’s say you and your friends came up with a new project and decided to share responsibilities. One will be responsible for the functionality, the other for the design and design, the third for registration, authorization and security. In this case, you need to branch. As already mentioned, a branch is a set of commits going sequentially one after another. The master branch is called master. Other branches are for implementing new features or fixing bugs. Thus, in a separate branch, you can make any changes, and then merge them with the main one. Many experts do not advise creating commits in the main branch, but recommend creating a new one, making changes in it and then merging it into master. To start a new branch, you need to run the command:
git branch
bugFixThis can also be done with the following command:
git checkout –b
bugFix
The second method differs from the first one in that in this case, after executing the command, you immediately get into the created branch.
It is better to name the new branch with a concise, but at the same time sufficiently capacious and understandable name to prevent confusion in the project. When using your system, you can specify an identifier before the task name. Also, do not forget to leave your comment in each commit you create, which should indicate the essence of the changes. In order to move from one branch to another, you need to run the following command:
git checkout
new
_1 After finishing work, the changes made to the current branch must be merged into the master, masters. To do this, first checkout the master branch using the command:
git checkout master After that, update the local branch:
git
pull
origin
masterNow you can merge branches:
git
merge
bugFix This command adds changes from the branch specified in the (bugFix) command to the branch you are on, in this case master. To view the current state of the branch, you need to enter the command:
git status In order for other users working on the project to see the changes made, you need to push them to the server. To do this, you must first go to the branch that you want to push to github. To enter master, run the command:
git checkout master After that, you can push it to the Github server:
git push origin masterIn order for another person to gain access to the project, you need a service for storing the code, for example, Github. If you have recently joined the project and you need to download it to yourself, run the command:
git clone https://github.com/…/….git
Here https://github.com/…/….git is the address of the repository. It can be obtained by opening the desired project and clicking on the green “Code” button.
Important advice!
It is recommended that you update masters on your local machine before creating a new branch. To do this, enter the desired branch and run the following command:
git pull origin master As a result, the actual changes will be downloaded from github. In the same way, you can update any branch. To update all existing branches, you can run the command:
git pull
A common problem when working with a Git project
When trying to automatically merge changes, it may happen that both branches have changes on the same line in this case when you run the command:
git merge master The following error appears:
Auto-merging Hello.py
CONFLICT (content): Merge conflict in Hello.py
Automatic merge failed; fix conflicts and then commit the result. In this case, you need to resolve the conflict manually. To do this, open the file in which the error occurred, in our case it is Hello.py, figure out what’s wrong and troubleshoot. After that, add the corrected file with the command:
git add
Hello
.
py And create a new commit:
git commit -m “Merged conflict”
Useful commands – Git commands
You can find out how the bottom branch differs from another using the command:
git
diff < first_branch > <second_branch> To delete an extra branch, type:
git branch -d <
branch_name
> popular commands:
git help Get help on a specific command:
git help <command_name> Git and GitHub beginner course – what you need to know about installation, how to install, commits, repository, commands, how to create, delete and make changes to branches: https: //youtu.be/zZBiln_2FhM
GUI programs for working with Git
It is easier to manage software versions not through the command line, but using a graphical interface. Some development environments and text editors provide a graphical interface for working with Git. But there are also special programs, we list some of them:
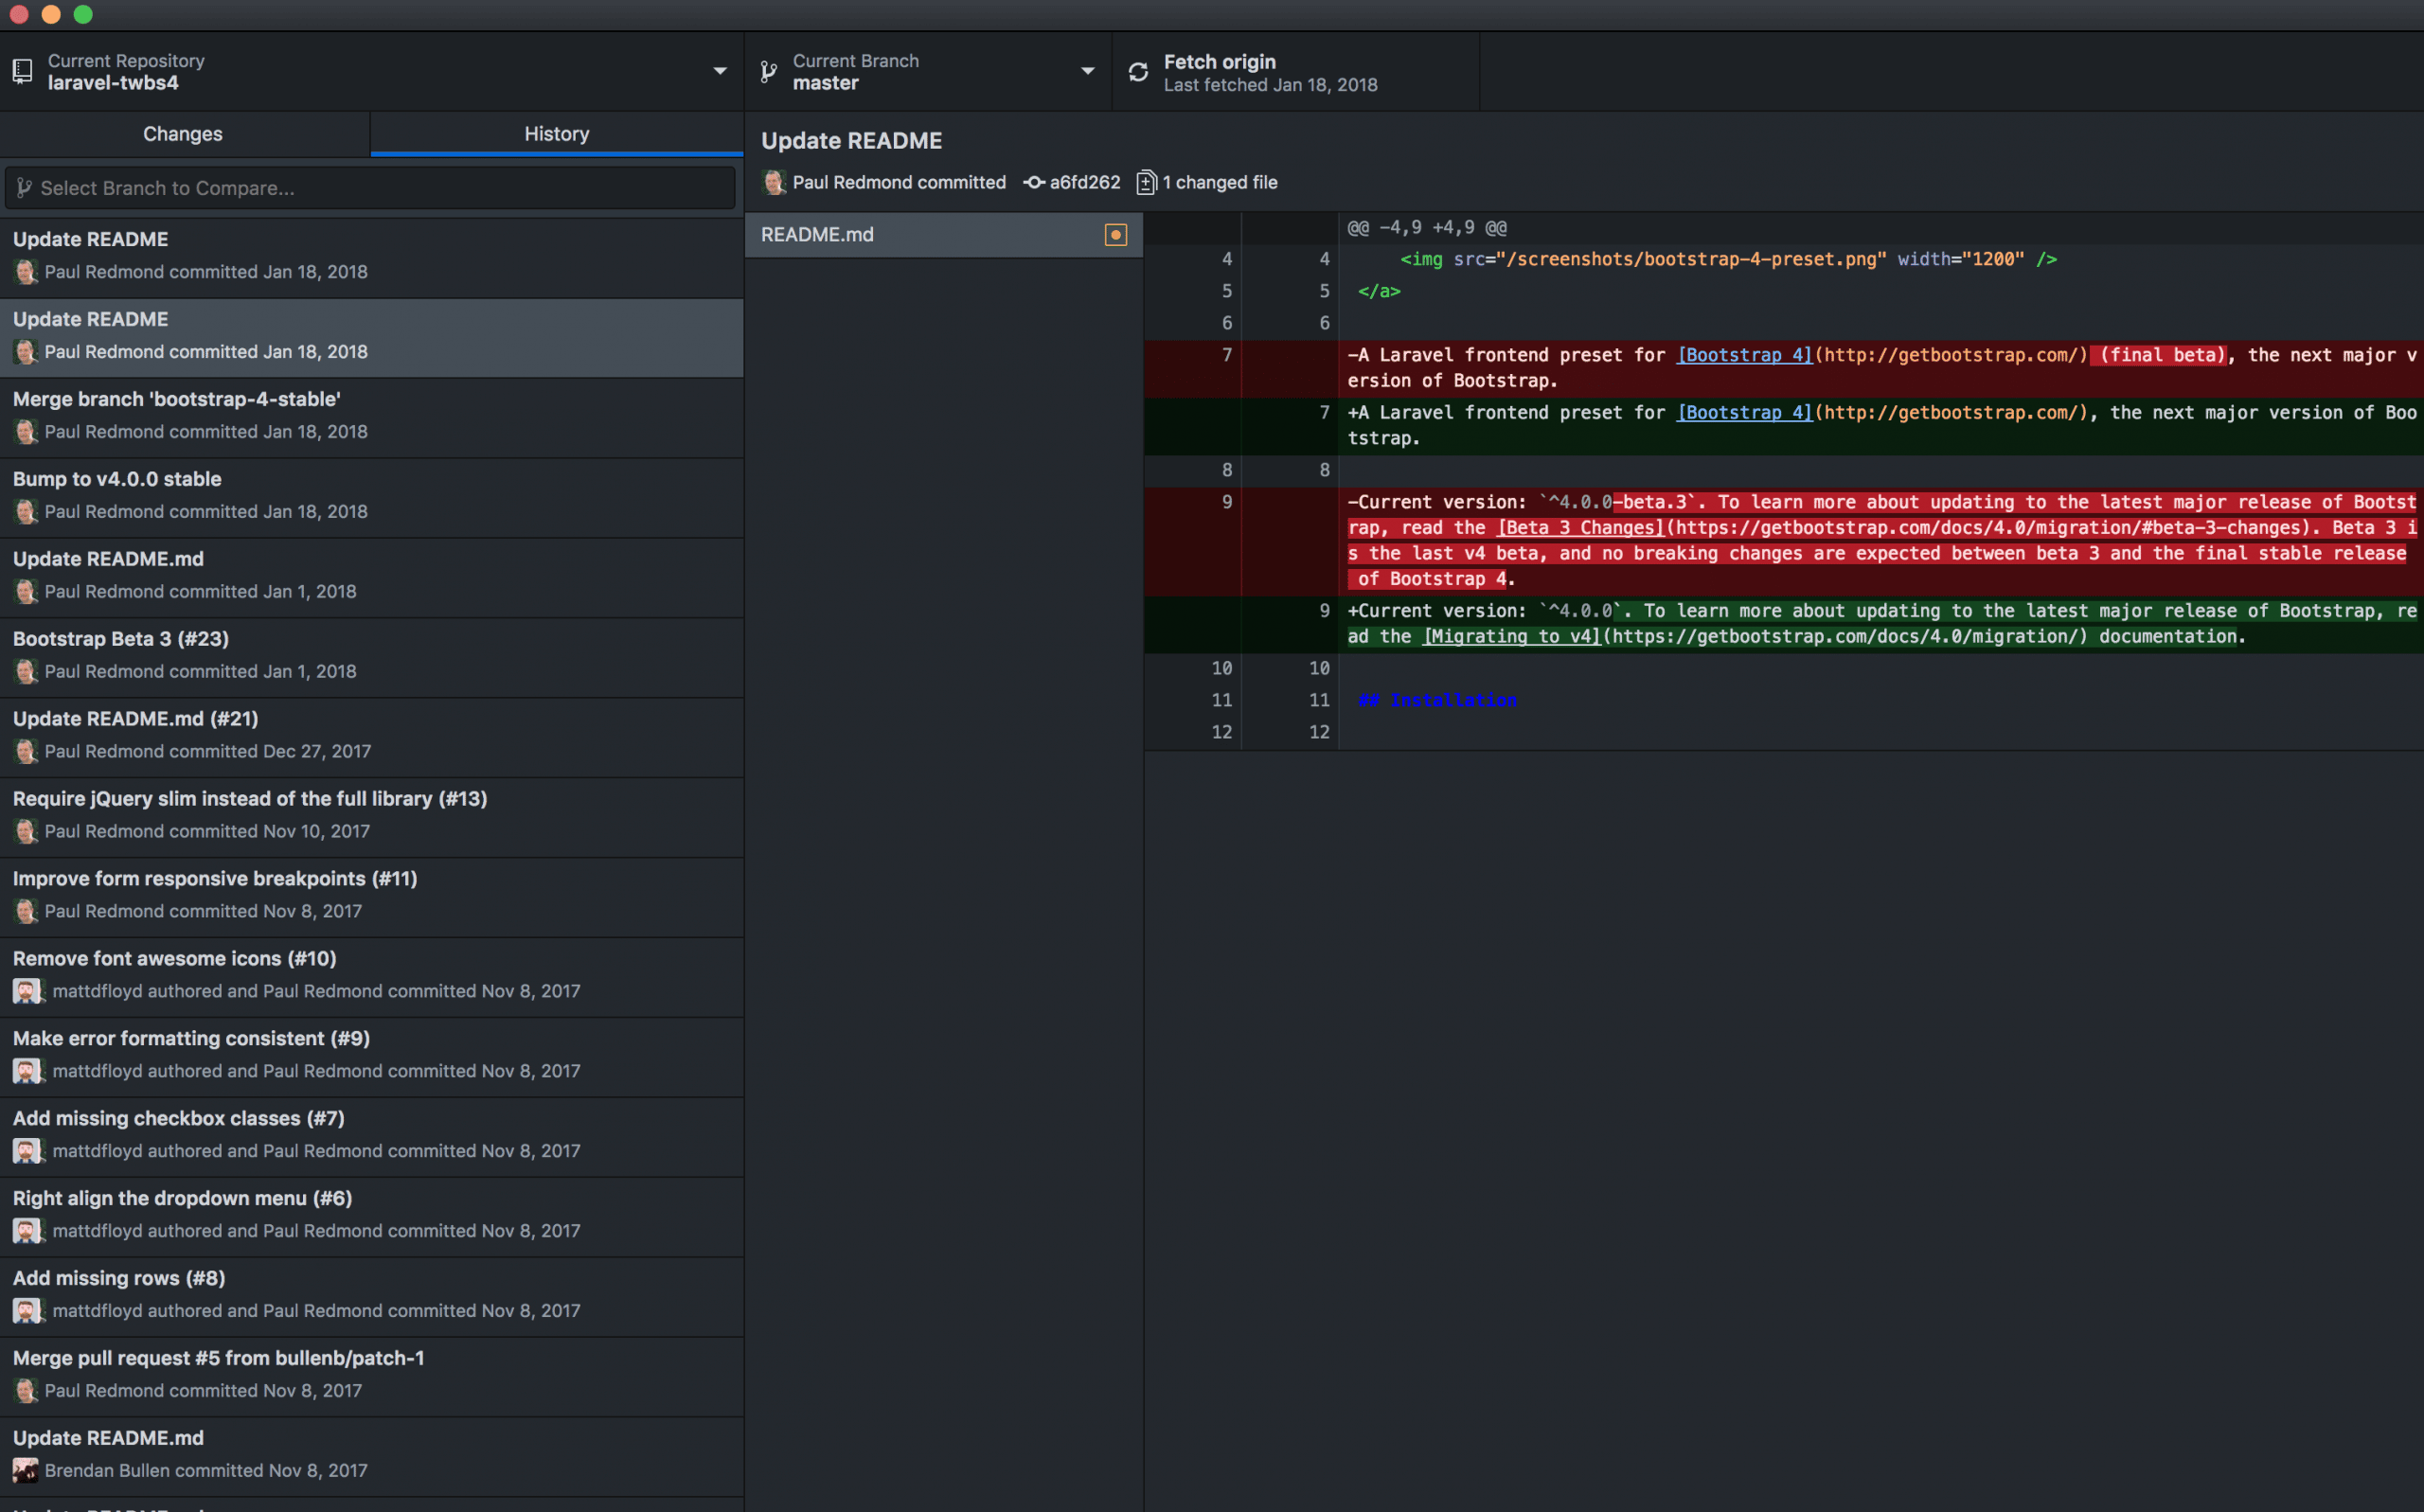
- GitHub Desktop is a graphical application designed to work with the Git utility and the Github service, it can clone and download repositories to your hard disk, as well as manage changes and do other useful things.
- Sourcetree is a free Git client for Windows and Mac operating systems that makes it easy to interact with repositories.
- GitKraken is a user-friendly graphical client for Windows, Linux and MacOs that supports GitHub, GitLab and Bitbucket services. With it, you can not only solve basic tasks, but also perform more complex operations, for example, merge and rearrange commits, merge branches, rewrite history.


GitHub Desktop


Sourcetree
SourceTree is a free application for working with GitHub, BitBucket and Mercurial services. It is available for platforms running Windows and iOS. Sourcetree is beginner-friendly. It has an intuitive GUI for repositories and allows you to use the full power of Git through a simplified interface. To install SourceTree, you need to download the installation file from the official site and run it. During the installation process, you will need to allow the application to make changes to the hard drive, agree to the license agreement. Also during the installation process, SourceTree may ask if you want to install any additional git software. You must say “Yes” and install this software. There are two ways to connect to the Github service:
- Through the OAuth authorization protocol.
- With an SSH key.
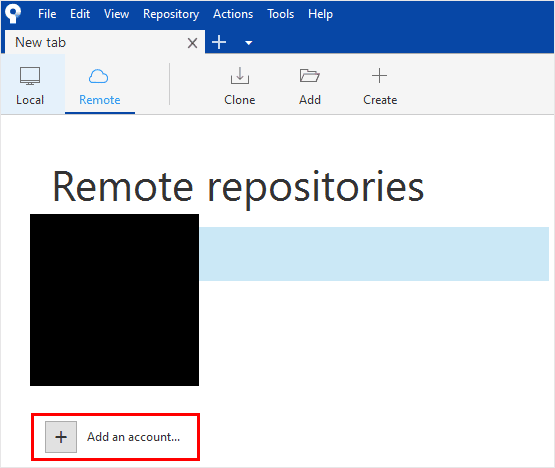
Let’s talk about each of them. The first way is to connect GitHub with a remote account. Allow SourceTree to connect your GitHub account to OAuth. This is the easiest way to connect GitHub to SourceTree.
- First click “Add an account”.
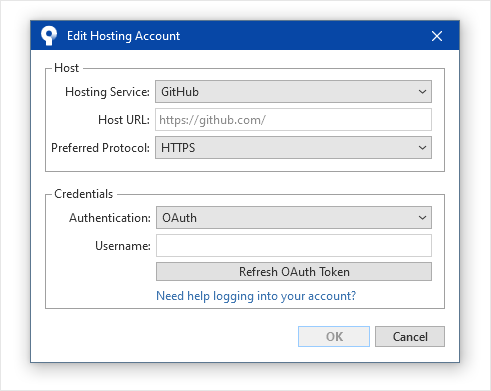
- Then select GitHub for hosting. Do not change the preferred protocol and authentication, that is, leave HTTPS and OAuth. Then click “Refresh OAuth Token”. The app will automatically open a web page in your browser and ask you for your GitHub account login details. If you have previously logged into your GitHub account in this browser, this step will be skipped.
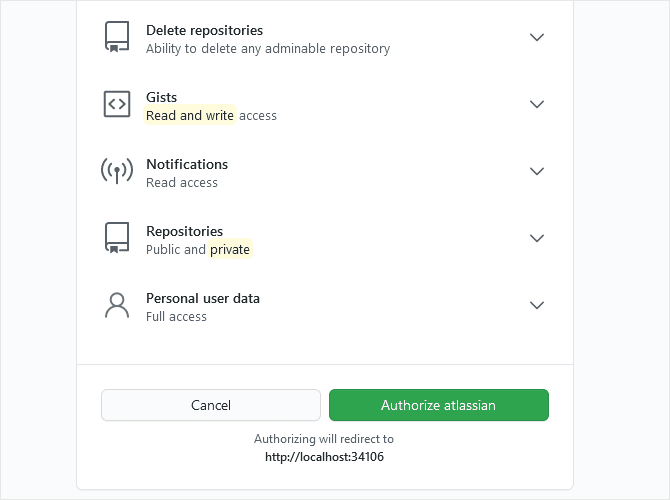
- Click “Authorize atlassian” to allow SourceTree access to your GitHub account.
- After that, you should see a message about the successful completion of authentication. Click OK.


You can then view your entire repository in SourceTree by clicking on your account.

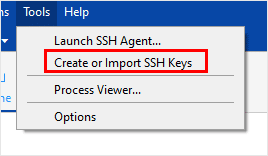
- To generate an SSH key pair, go to the “Tools” menu and click “Create or Import SSH Keys”.
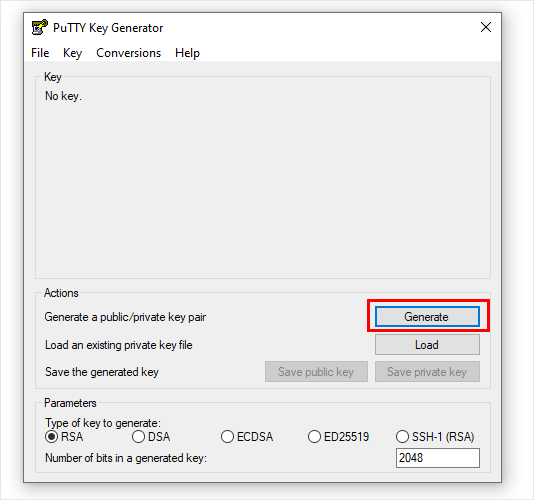
- Click “Generate” in the PuTTY key generator window.
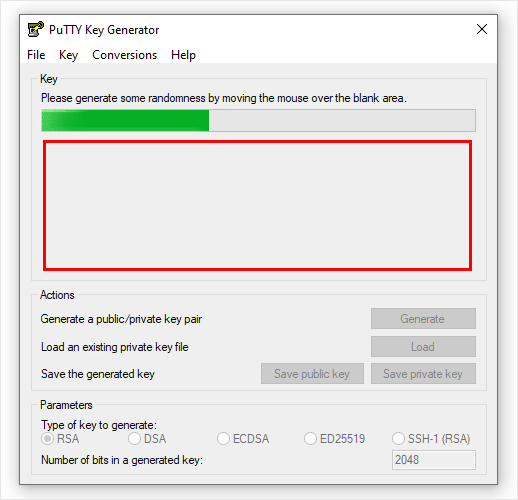
- Move the mouse cursor to an empty space, and move the mouse cursor until the end of the generation.
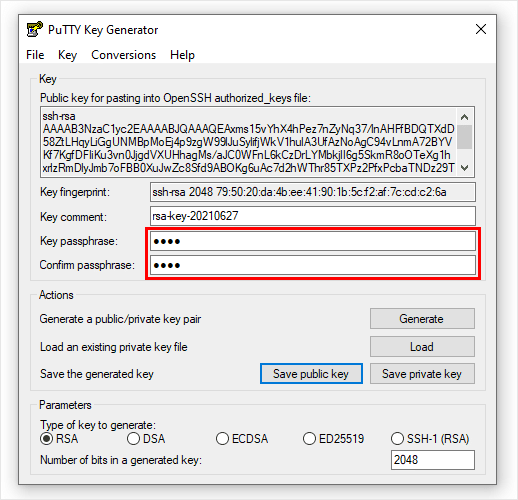
- After you have finished generating the SSH key, set a password for your SSH key.
- Save the public key and private key.
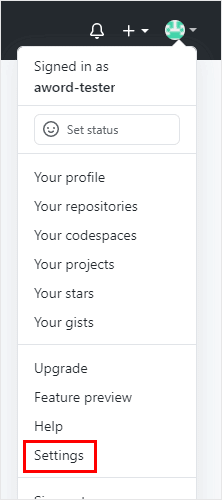
- Do not close the PuTTY key generator. Log in to your GitHub account, click your avatar icon in the top right corner, then click Settings.
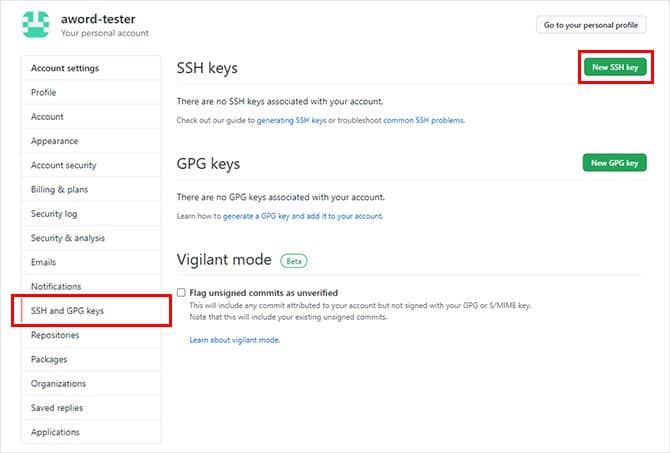
- Click on “SSH and GPG keys” and select “New SSH key”.
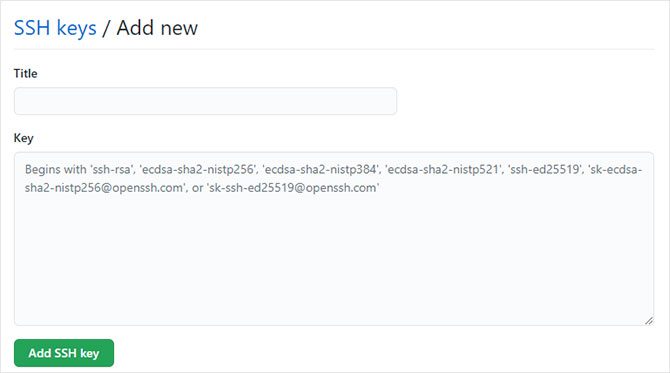
- Give your SSH key a name and copy the public key from the PuTTY key generator into the key field. After that, click “Add SSH Key”.
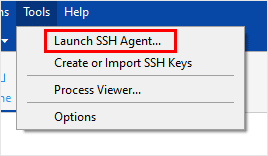
- Return to SourceTree, go to “Tools” and click on “Launch SSH Agent”.
- After a while, click the small monitor icon on the taskbar.
- As a result, a list of keys will appear. Click “Add Key” to add the private key you saved earlier.


Now go back to the GitHub repository page and try to clone it using SSH. https://articles.opexflow.com/programming/chto-takoe-github-kak-polzovatsya.htm
GitKraken
GitKraken is another application designed to work with various version control systems using the GUI. To get started, you need to register on GitHub and install the GitKraken application. When you start the application, you need to enter your username and password from the GitHub service. In order not to enter a password every time, you need to set up an SSH key. If you don’t already have an SSH key generated, you can follow the GitHub guide on creating a new key. Once you have your SSH key, you can add it to your GitHub account. To do this, select “File” then “Preferences” from the main menu. Then select “Authentication” and provide the paths for your public and private keys. The first step in publishing any content to GitHub is to create a local repository to keep track of your work. This folder will contain all the files that you want to publish to GitHub. You must follow the instructions:
- To create a new repository in GitKraken, select “File” from the main menu, then “Init Repo”. There will be several options for different types of repositories, select “Local Only”.
- Then select the folder that will be your new repository. You can select an empty folder or a folder that already contains files; you won’t lose your changes.
- The next dialog box also contains settings for default templates and license files. Leave everything as it is.
- Click “Create Repository”.
You don’t need a Github account to use Git (or GitKraken) locally on your computer. However, if you plan to collaborate with other users or use files from multiple computers, you will need to use a host such as Github. To create a repository on GitHub, after clicking “Init Repo”, select the line “GitHub” and fill in the window that appears as follows:
- Account – The name of your GitHub account.
- Name – the name of the repository. Compose it from letters, numbers and underscores.
- Description – Description of what this repository will contain.
- Access – access to a remote location, whether it should be visible to everyone or remain open only to you and the people you add as collaborators
- Clone after init – leave this option checked, which will make the repository available to you on GitHub.
- Where to clone to – select a location on the computer where the newly created repository folder should be placed.
- Finally, click the “Create Repository and Clone” button .
Trading Bots on GitHub – Bot Github Open Source
The Git version control system is used, among other things, to develop
trading robots . Here are some examples of such developments that you can download and use.
Python Trading Robot
A trading robot written in Python is available at https://github.com/areed1192/python-trading-robot, which can run automated strategies using technical analysis. The robot is designed to simulate several common scenarios: It can calculate the overall risk scores associated with a portfolio and provide real-time feedback while trading. Allows you to work with a real-time data table that contains both historical and current prices as they change. It will make the process of storing data simple and with quick access. In addition, it will be customized so that you can easily view your financial data as it comes in and perform further analysis if necessary. Contains indicators that use both historical and current prices.
Trading bot Cassandre
Cassandre trading robot link to GitHub https://github.com/cassandre-tech/cassandre-trading-bot – is able to take care of connecting to the exchange, accounts, orders, transactions and positions, so you can focus on building your strategy. Each release is tested to work with the Kucoin, Coinbase and Binance exchanges. With it, it is easy to create your own strategy, for this you just need to set the conditions for when you want to create short or long positions and set the rules. There is a loader for testing the bot on historical data. During the tests, Cassandre will import the data and add it to your strategy. Cassandre will help you build a strategy based on the ta4j technical analysis library.

EA31337 Libre
EA31337 Libre at https://github.com/EA31337/EA31337-Libre is a free multi-strategy Forex trading robot written in MQL. The trading robot comes with over 35 strategies to choose from. Each strategy can analyze the market on different timeframes independently. Market analysis is based on popular technical indicators. You can also write your own strategies.


Robot kevirite. Banavo