What is GitHub, why is it needed and how to use GitHub, how to start using the service – a guide for beginners.
- What is GitHub and How to Get Started – A Beginner’s Guide
- Git and GitHub – what is the difference, first acquaintance with Git and GitHub
- What is Git?
- What is GitHub?
- What is the main difference?
- Interesting facts about Github
- Github features
- How GitHub Works, Features
- Forking
- Pull requests
- Merging
- Guide – how to get started in Github from scratch
- Step 0Install Git and Create a GitHub Account
- Step 1: Launch Git and create the first local repository
- Step 2. Create a new file in the repository
- Step 3: Add the file to the tracking staging environment
- Step 4Create a commit
- Step 5. Create a new branch new branch
- Step 6Create a New GitHub Repository
- Step 7: Pushing the Project Branch to GitHub
- Additionally
- Step 8. Create the first pull request
- Step 9Merge the pull request
- Step 10Revert Github Changes on Local Machine
- Additional features of Github and Git
- Cloning a repository to a local machine
- Finding remote repositories
- GitHub desktop version – what is GitHub Desktop, main functionality, features and installation process
- How to install
- Main functionality
- Github API
- Managing and configuring Github Desktop projects
- Creating, adding and cloning a repository
- Creating a New Branch
- Safety
- Security policy setting
- Dependency Graph Management
- Licenses
What is GitHub and How to Get Started – A Beginner’s Guide
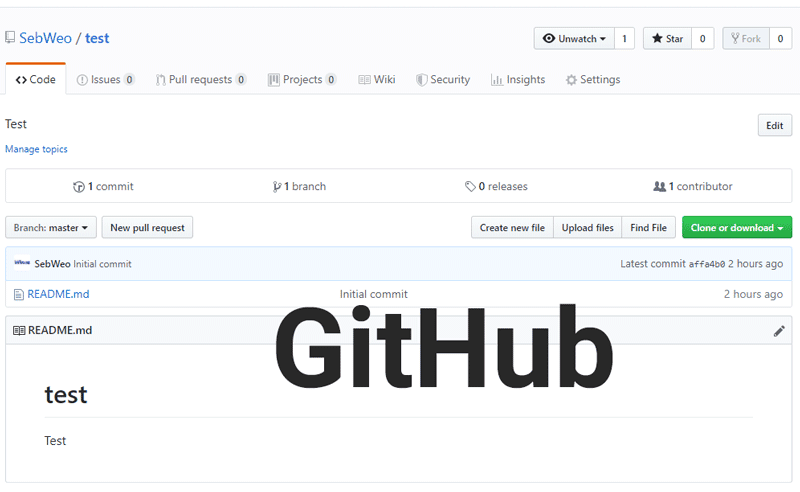
GitHub is an online portal where developers and programmers can upload the code they create and work together to improve it. The hallmark of GitHub is its robust version control system. Version control allows programmers to customize software without compromising the software itself. The proposed changes can easily be merged into a full release, but only after all changes have been reviewed and approved.

Git and GitHub – what is the difference, first acquaintance with Git and GitHub
What is Git?
Answer: A fast and scalable version control system . Git is a free and open source distributed revision control system designed to be fast and efficient for any project, from small to very large.
What is GitHub?
Answer: a powerful cloud service for managing private developments and open source projects.
What is the main difference?
Git is a full-fledged software in the version control system category, which is installed on the user’s personal computer. Git allows you to make changes to the code through the command line (Microsoft PowerShell), and GitHub provides the ability to store projects in public access.
Interesting facts about Github
- The maximum number of users on the site last year (according to statistics on July 24, 2021) was 45 million people.
- In 2018, Microsoft acquired GitHub for $7.5 billion.
- There is an open source git repository on Github. Anyone can make changes to it. The project is available at the link – https://github.com/git/git?ref=stackshare
Github features
- Ability to integrate with the most popular platforms and services – Amazon, Google Cloud and Code Climate.
- Support for over 200 programming languages.
- High level of consolidation and “guild solidarity”. When a user publishes their project on GitHub, the rest of the programming community can download and evaluate the work, the quality of the code, and the degree of its sophistication. Third party users can warn the project owner about possible problems, variable conflicts, etc.
How GitHub Works, Features
Three of the most important features of Github are branching, pull requests, and merging. It is worth considering each function separately.
Forking
Forking a project creates a copy (fork) that allows the user to experiment freely without affecting the original project. Create forks and pull requests: https://youtu.be/nT8KGYVurIU
Pull requests
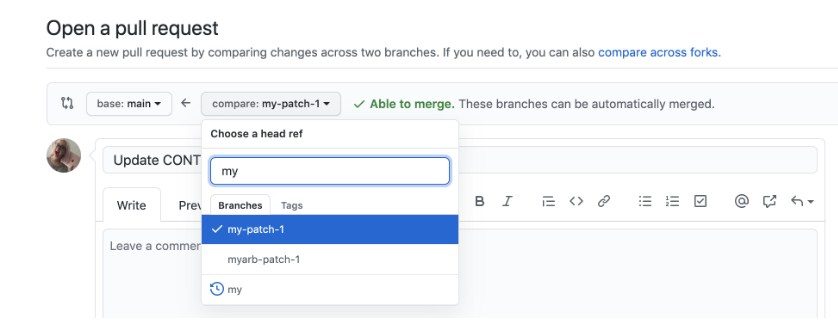
A pull request is published by the developer after he finishes working on fixing/changing the code. At the same time, the project owner himself can review the changes made and ask any additional questions.
Merging
After the owner approves the pull request, they merge the pull request and apply the changes from the forked project to the source code.
Guide – how to get started in Github from scratch
This guide is perfect for all beginners who are just starting to learn Git and Github. The following steps will help you build an optimal system for working with this software. You will learn how to make changes to the codebase, open a pull request (create a pull request), and merge code into the main branch. So let’s get started. 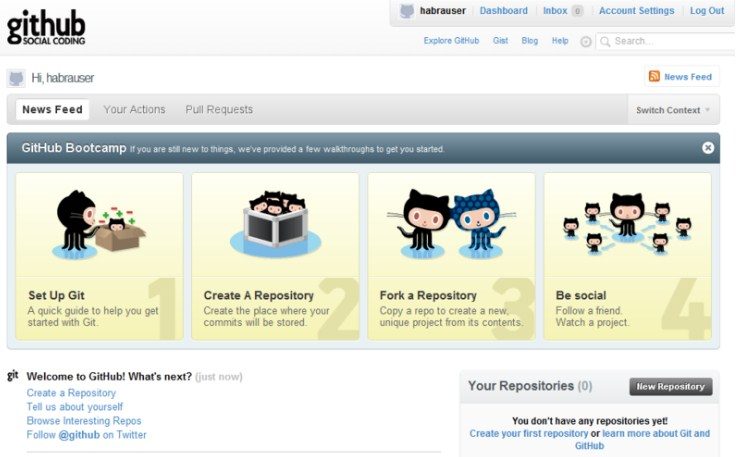
Step 0Install Git and Create a GitHub Account
- Go to the official Git website: https://git-scm.com/downloads
- Click on the link to download the desktop version of Git for Windows and wait for the download to finish.
- Extract and run the Git installer by double-clicking the Git.exe file.

- Allow the application to make changes to the PC by clicking the “Yes” button in the “User Account Control” dialog box that opens.
- Start the Git installation process. Read the main GNU Public License document and click Next.

- Specify a location to install the program, or leave the default values. The program will prompt you to create a Start menu folder. Skip this item.
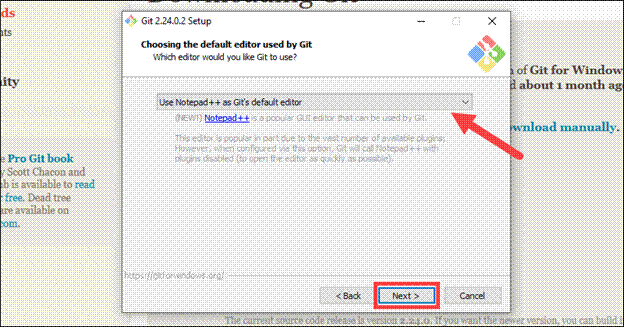
- Select the text editor you want to use with Git. In the drop-down window, select Notepad ++ (or any other text editor that you have previously worked with) and click “Next”.
- Specify a name for the new project branch. The default value is “master”. It is recommended that you leave this setting at the default.
- In the options for choosing PATH, SSH client, server certificates, line endings and terminal, leave everything as it is and click the “Next” button.
- Leave all default settings and start installing the program.
- Once the installation is complete, check the boxes to view the release notes and start Git Bash. Close the installer window.
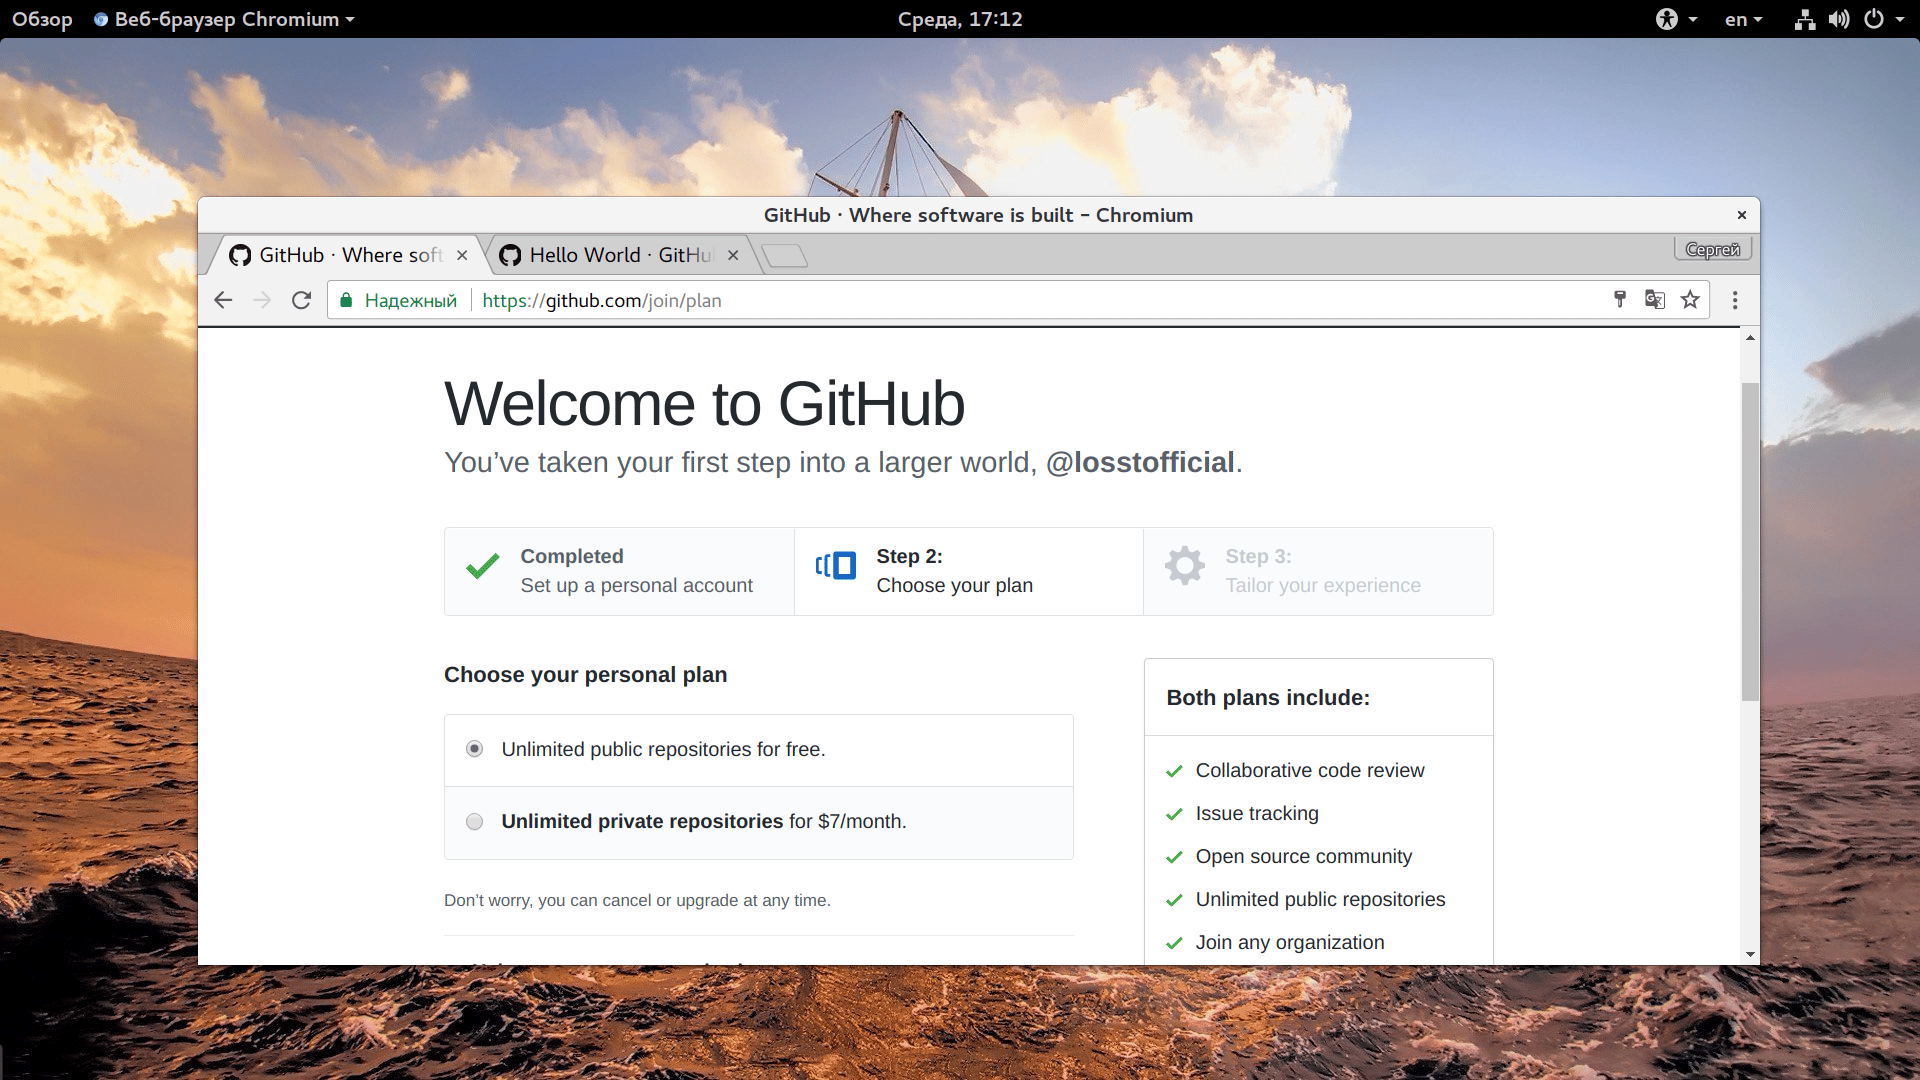
You can register an account on Github using the following link: https://github.com/join. To do this, you must enter the basic registration data required in the future to verify the account.

Step 1: Launch Git and create the first local repository
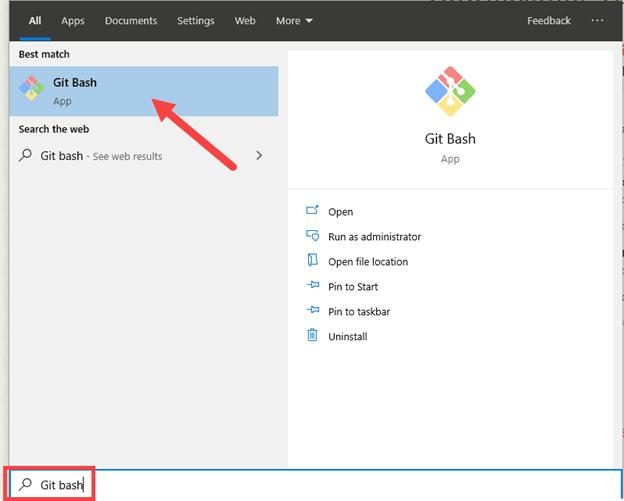
Git has two usage modes – bash (Git Bash) and graphical user interface (Git GUI). To start Git Bash, open the Start menu – Windows, type git bash and press Enter (or double left-click on the program’s shortcut). To launch the Git GUI, open the Start menu – Windows, type git gui and press Enter. In our case, we will use Git Bash.
getrekt:Desktop getrekt $ cd ~/Desktop
getrekt:Desktop getrekt $ mkdir myproject
getrekt:Desktop getrekt $ cd myproject/
The mkdir command creates a new local project folder. Create our first Github repository: https://youtu.be/yHCUc6cmhcc
Step 2. Create a new file in the repository
In the project folder, add a new text file using the touch command. In the standard way, the command will create an empty text file that will have the .txt extension.
Attention! Git saves/manages changes only to the files it tracks. After creating a new file, the user can track its status using the git status command. The console will give a list of files that are present in the repository.
As soon as you add a file to the folder containing the git repository, the program will notice the change inside the project. However, automatic tracking will not be enabled, you must use a special command for this – git add.
getrekt:myproject getrekt $ touch getrekt.txt
getrekt:myproject getrekt $ ls
getrekt.txt
Step 3: Add the file to the tracking staging environment
Add the file to the staging environment with the git add command.
getrekt:myproject git add . With this command, the program will start automatic tracking of all files that will be created in the project folder. You can check if the command works with git status. This is what the logs look like on the Git Bash command line after typing git status:
getrekt: getrekt getrekt$ git status
On branch master
Initial commit
Changes to be committed:
(use “git rm –cached …” to unstage)
New file added
New filename: getrekt.txt
new file: getrekt.txt Log comment: The file has not yet been committed, but is about to be added.
Step 4Create a commit
Commit is a checkpoint of any repository. Simply put, a change package that stores information about added, edited or deleted files that store certain code.
getrekt:myproject getrekt $ git commit -m “MY FIRST COMMIT GUYS!”
[master (root-commit) b345d9a] MY FIRST COMMIT!
1 file changed, 1 insertion(+)
create mode 100644 getrekt.txt
The command to create a commit is git commit -m “Commit Name”.
Attention! The message at the end of the command should be meaningful and understandable to other project developers. Don’t name your commits like “asdfadsf” or “foobar”. Otherwise, no one will understand anything, and you will have to spend a lot of time deleting them.
Step 5. Create a new branch new branch
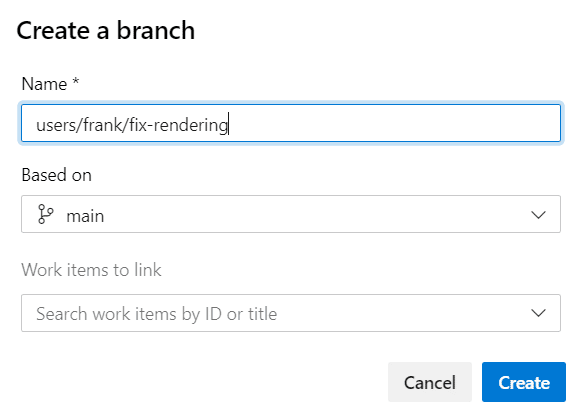
New branch is a full-fledged branch of the project, which consists of a whole set of commits. Represents a separate release of the product, but within the version control system. Branches allow the user to move between “states” of a project.
In the official git documentation, the description of branches is: “Branch in Git and Github is a movable pointer to one of the repository’s commits.”
For example, if a user wanted to add a new page to their website, they would be able to create a new branch just for that particular page without affecting the main body of the project. As soon as he is done with it, he can merge the changes from his branch into the main one. In the case of a new branch, Git keeps track of which commit branched from.
getrekt:myproject getrekt $ git branch
master
* my-new-branch The name my-new-branch with an asterisk indicates which branch the user is currently on.
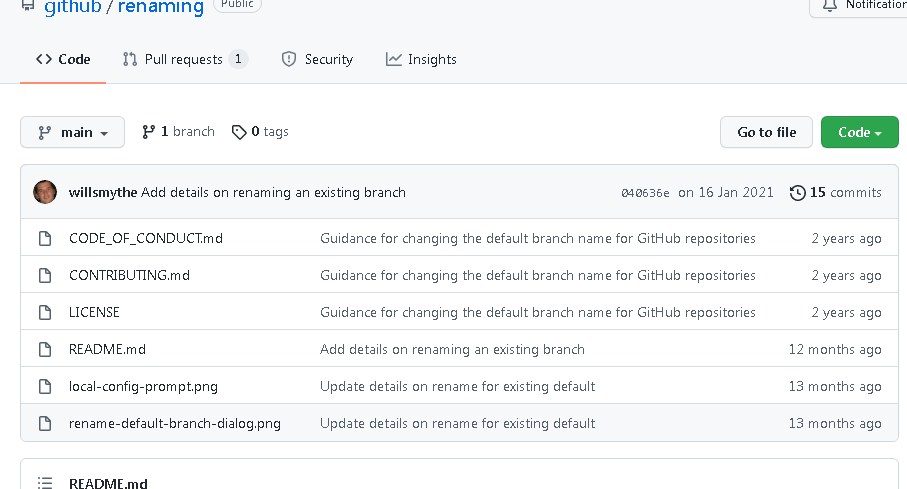
Note: By default, the very first branch of each git repo is named “master” (and is usually used as the master in a project). As part of the fight against racism, some developers have begun using alternative names for the default branch, such as “primary”. However, more often than not, users may see “master” or similar names used to refer to it.
It’s worth bearing in mind that almost every repository has a master branch that can be considered the official version of the project. If it’s a website, then the branch is the version that users see. If it is an application, then the master branch is the release that users install on their computer or mobile device. This is how traditional versioning of Git and Github products works. The official site has more detailed documentation on using different default branch names. The information is available on Github at https://github.com/github/renaming
Step 6Create a New GitHub Repository
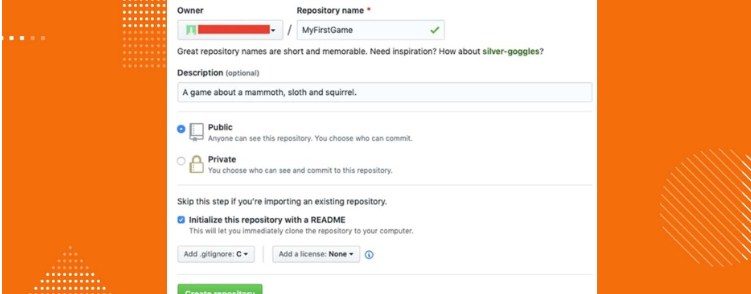
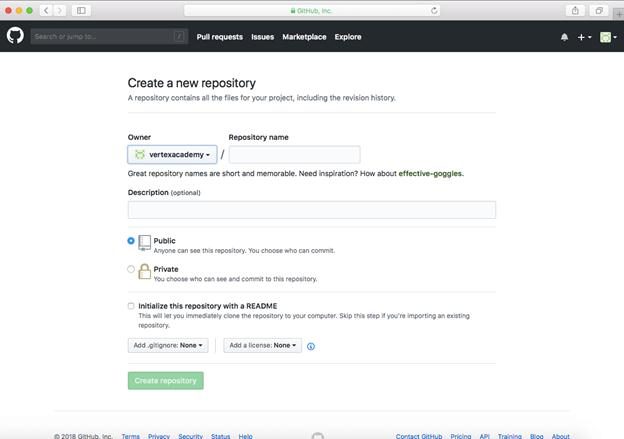
This step is not required if you only want to track your code locally. But if you work in a team and accept changes from other programmers, then you can use the current capabilities of GitHub to jointly change the project code. To create a new repository on GitHub, you need to log in to the system and go to the main page of the site. From the main menu, click on the “New Repository” button, which is located under the “+” sign next to the profile photo in the upper right corner of the navigation bar: After clicking on the button, GitHub will ask the project owner to name the repository and provide a short description:
Attention! Downloading a local repository can also occur using the command line, and more specifically the commands git remote add origin github_url (creates a record of a new connection to the remote repository), git push -u origin master (establishes a connection between the branch in which the developer is located and the master branch on a remote server).
This is what the logs look like on the Git Bash command line:
getrekt:myproject getrekt $ git remote add origin https://github.com/cubeton/mynewrepository.git
getrekt:myproject getrekt $ git push -u origin master
Counting objects: 3, done.
Writing objects: 100% (3/3), 263 bytes | 0 bytes/s, done.
Total 3 (delta 0), reused 0 (delta 0)
To https://github.com/cubeton/mynewrepository.git
* [new branch] master -> master
Branch master set up to track remote branch master from origin.
Step 7: Pushing the Project Branch to GitHub
A new project branch and repository has been created. It remains to “push” the branch and transfer it to the new Github repository. This way, third-party community members will be able to see the code and make changes to it. If the revisions are approved, the project owner can merge the changes into the main version of the project. To push changes to a new branch on GitHub, you need to enter the git push command at the command line. GitHub will automatically create a branch in the remote repository:
getrekt:myproject getrekt$ git push origin my-new-branch
Counting objects: 3, done.
Delta compression using up to 8 threads.
Compressing objects: 100% (2/2), done.
Writing objects: 100% (3/3), 313 bytes | 0 bytes/s, done.
Total 3 (delta 0), reused 0 (delta 0)
To https://github.com/cubeton/mynewrepository.git
* [new branch] my-new-branch -> my-new-branch After refreshing the GitHub page, the user will see the new branch that has been pushed into the repository.

Additionally
What does the word origin mean in the git push origin command? When a user clones a remote repository on their local machine, git creates a standard alias for it in almost all cases, “origin”, which is essentially a shorthand for the URL of the remote repository. Submitting a project to GitHub: https://youtu.be/zM6z57OtR2Q
Step 8. Create the first pull request
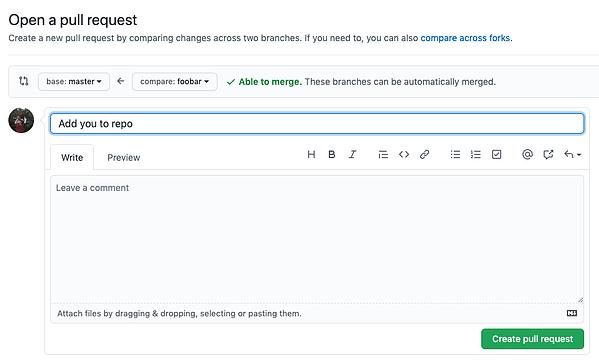
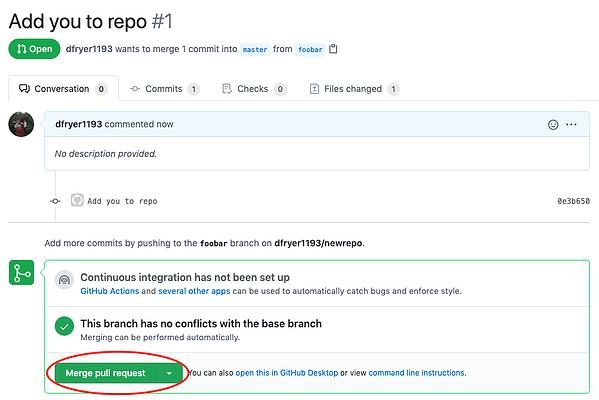
A pull request (or pull request) is a way of alerting repository owners that a developer wants to make some changes to the code. This is how the page with the pull request added looks like:
Step 9Merge the pull request
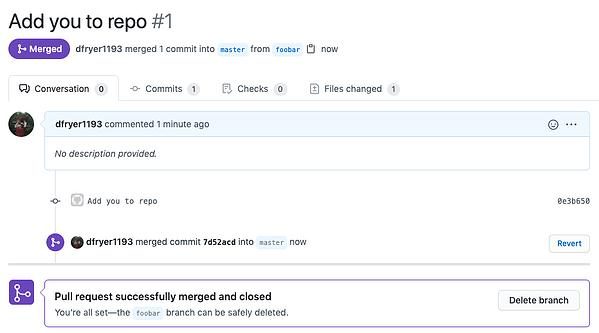
The green “Merge pull request” button at the bottom creates a pull request. After clicking it, the changes made are added to the main branch of the project.
Attention! Delete the branch after the merge. A large number of them can lead to confusion in the project. To delete a branch, click the gray “Delete branch” button in the lower right corner.


Step 10Revert Github Changes on Local Machine
At the moment, the repository in the Github system looks a little different than the user on the local computer. For example, a commit that a user made on their own branch and merged into the master branch does not exist on the local machine. To automatically synchronize different versions of a project, you must use the git pull origin master command (when working on the master branch) or git pull.
getrekt:myproject getrekt $ git pull origin master
remote: Counting objects: 1, done.
remote: Total 1 (delta 0), reused 0 (delta 0), pack-reused 0
From https://github.com/cubeton/mynewrepository
* branch master -> FETCH_HEAD
23242..232433berer3444 master -> origin/master
getrekt. txt | 1 +
1 file changed, 1 insertion(+)To check the current status of a command, type git log on the command line. It will list all commits.
getrekt:myproject getrekt $ git log
commit 32dgt472hf74yh7734hf747fh373hde7r3heduer73hfhf
Merge: 3fg4dd 34fg3u7j7
Author: Mtdes Ethan < getrekt@yandex.ru>
Date: Fri Sep 11 17:48:11 2015 -0400
Merge /cubeton/mynewrepository
commit 44hgfh7f74hdu9jt93hf9ifejffe
Author: Mtdes Ethan < getrekt@yandex.ru>
Date: Fri Jan 07 17:48:00 2021 -02356
commit 46thf9496hf9485hkf857tg9hfj8rh4j
Merge: 33fh5d 3689gfh
Author: Mtdes Ethan < getrekt@yandex.ru>
Date: Fri Jan 07 17:51:00 2021 -02356
commit 46thf9496hf9485hkf857tg9hfj8rh4j
Merge: 33fh5d 3689gfh
Author: Mtdes Ethan < getrekt@yandex.ru>
Date: Fri Jan 07 17:55:00 2021 -02356
Added some more text to my file
commit 355904-43hg940fg959hfg0g95jjgdgdfgf57i86f
Merge: 343fggdd 53efhgffddg
Author: Mtdes Ethan < getrekt@yandex.ru>
Date: Fri Jan 07 17:58:00 2021 -02356
This is my first commit! Ready! Now the user is familiar with all kinds of work in the version control system. Git and GitHub tutorial for beginners on how to install Git and get started with Github, branches, repositories, commits and other concepts in GitHub practice: https://youtu.be/zZBiln_2FhM
Additional features of Github and Git
Let’s look at other useful “chips” that will allow the developer to simplify the work on version control.
Cloning a repository to a local machine
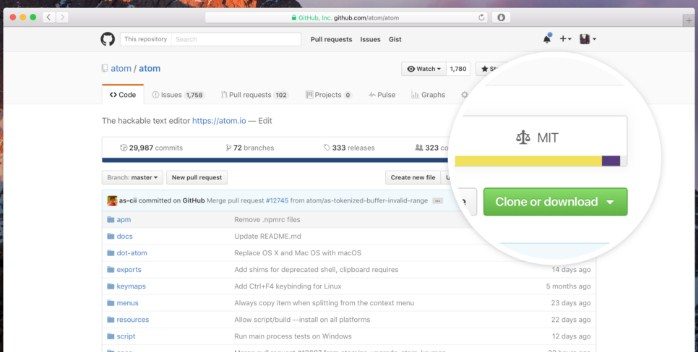
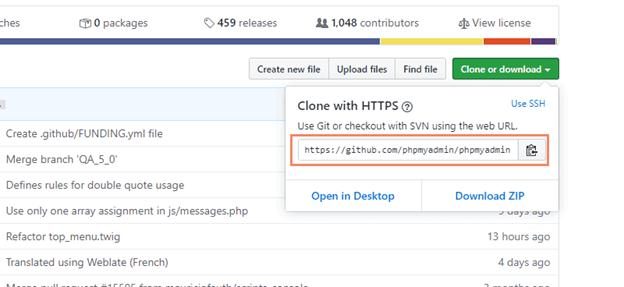
Go to your GitHub repository. In the upper right corner above the list of files, open the “Clone or download” drop-down menu. Copy the HTTPS clone URL.
git clone repository_url
repository_url – URL of the current project to be cloned. Instead, the url of the repository is inserted.
In the example above, the command clones the repository over HTTPS. Another option is cloning with URLs over SSH keys. To do this, you need to generate an SSH key pair on Windows and assign a public key to the GitHub account.
Finding remote repositories
After cloning, a copy of the repository from GitHub should appear in the working directory on the computer. The project should contain a directory with a name and main files. In order to switch to it, you need to write the following command:
cd git_project
Note: Replace git_project with the actual name of the downloaded repository, or specify the contents of the current directory with the ls command. The second method is used in cases where the user cannot remember the name of the project.
GitHub desktop version – what is GitHub Desktop, main functionality, features and installation process
GitHub Desktop is a desktop application that provides a GUI based interaction with GitHub. Unlike Git, the desktop version of GitHub allows you to execute the same commands using the user interface by clicking buttons, which makes it much easier to work with repositories.
How to install
- Follow the link – https://desktop.github.com/
- Start downloading the installation package of the program.
- Double click on the icon of the downloaded file and proceed with the installation of Github Desktop.
- Launch the program through the Start menu.
- Sign in to GitHub using your user account details.
Main functionality
- Creating, adding and cloning repositories.
- Using the program to manage project tabs.
- Making changes to a branch.
- Creating issues, pull requests and commits.
- Ability to access early versions of new products.
Github API
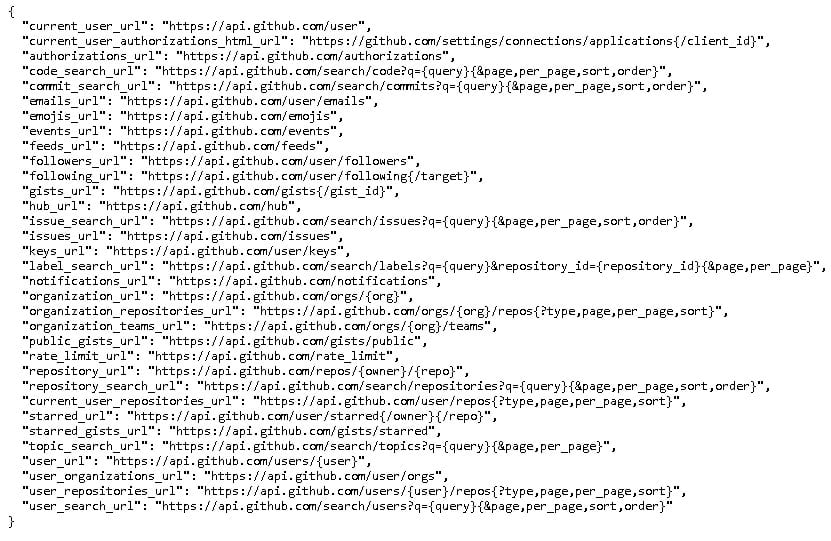
The Github REST API is an interface that provides developers with access to Github data, projects, and repositories, as well as sending server requests. The link https://api.github.com/ contains all the URLs to which you can send the simplest GET requests:
Managing and configuring Github Desktop projects
After installing, registering an account, and setting up the application, the user can start using the GitHub program.
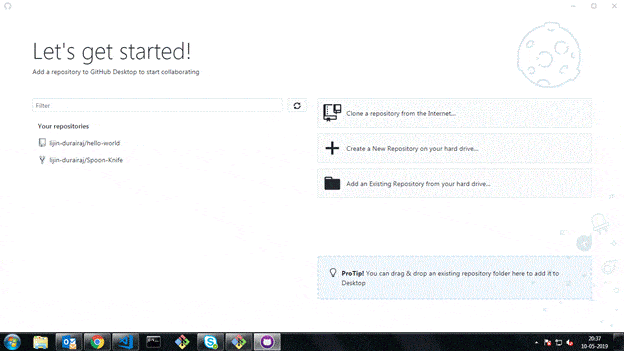
Creating, adding and cloning a repository
To create a new repository, select “File” and click the “Create repository” button. To add a local project, select the “File” menu and click the “Add Local Repository” button. For cloning, you must select the menu “File” – “Clone repository”.
Creating a New Branch
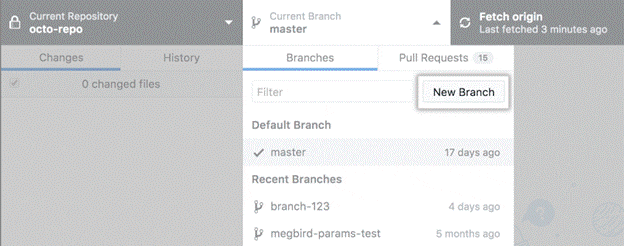
To create a separate project branch, open the Current Branch section and click the New Branch button. The user will be able to see the branch in the GitHub interface and make a pull request to track changes.
Safety
The desktop and web version of Github allows you to configure and increase the security level of a user account. All functionality is available in the “security settings for storage” section. It is worth considering in more detail.
Security policy setting
On the main page of your repository, click:
- “Security” – “Security Policy” – “Start Setup”.
- Add information about supported versions of your project and how to report possible vulnerabilities.

Dependency Graph Management
A dependency graph is automatically generated for all public repositories, but there is no such feature for private repositories. The graph identifies all outgoing dependency flows and allows you to identify vulnerabilities in the project. To set the dependency graph, click on “Settings” – “Security and Analysis”. Opposite the graph, click “Enable” or “Disable”.

Licenses
Github licensing provides for the use of two main types of
license :
- The GPL is a type of license that allows other users to use someone else’s work in other open source projects. However, commercial companies cannot do this.
- LGPL/Commons/MIT/Apache , etc. – the user gives away his code for free use. Others can make money from it.
